.jpg)
Playbook: App Building 101+102 (Advanced Vibe Coding guide)
Made with ❤️ by Pranav Menon
If there’s trouble loading the video, here’s the direct link
This guide teaches you how to build real software projects using AI, even if you’re new to coding environments.
You are not expected to understand everything upfront. But you are expected to follow a repeatable process.
By the end of this guide, you’ll know how to:
- Ship a real, working web app
- Collaborate with AI as a serious building partner
- Reuse the same workflow for future projects
We’ll use a journaling app as our running example. The actual app matters less, the building principles and the process matters most.
This guide will have a fundamentals section (101) then an advanced section (102) for those that are looking to take their AI agent skills to another level
Don’t just read the guide. Actually implement the guide step by step. Reading along will not help you learn. Put 1 hour on the clock, and finish this end to end. Read every line intentionally.
Phase 1: Get really good at providing instructions (Prompt Engineering)
What we’re building:
A basic journalling app that connects to GPT and offers the user insights plus prompting questions to deepen the reflection practice.
Before building this app, we have to get a really clear idea on what it is that we want to build.
AI is ridiculously good at execution. However, in order for it to be really good at executing, you need to be really good at giving it good instructions.
Higher quality input = Higher quality output. All good prompts have the following format.
The Formula: Intent + Context + Process + Outcome = Effective Prompt
- Intent: Why do you want to build what you want to build? For a personal project for learning purposes? Or a product that you can ship for people to use? Get super clear here.
- Context: What do you want to build? How do you want the user experience to be when people are clicking through your product?
- Process: How do you want GPT to interact with you to get to your outcome?
- Outcome: What do you want the output from GPT to look like?
Follow along: The Initial Prompt (Put this into GPT or Claude)
I want to build a journalling app. This is primarily for me to tinker with projects and learn how to use AI. This is not meant to be public facing project.

It needs to be a clean, minimal interface so I can just focus on freeform journalling. When I'm done, there should be a button that says "Done". After that I want to use GPT to process my journal entry, provide some reflections, and provide 2 questions that will dig deeper based on my reflection.

The end goal here is to develop a PRD / build plan that I can feed into Cursor. I don't need code to be involved, just architectural details. Let's start by you asking me questions one by one to help me think through the different architectural elements of this project. Let's do it bucket by bucket. For each bucket, provide me with options and include your recommendation on how we should proceed.

Once we have an understanding of the architecture, break apart this project into chunks. Each chunk needs to be testable and executable. Only move onto the next chunk once one chunk is complete. After doing the buckets, ask me questions one after one to make sure you have clarity on what I want to build. When you have clarity, you can begin building the PRD.

Some additional notes: keep this simple. I'd like to deploy this cleanly on Vercel. Oh and I'd like to use gpt-4-turbo.
Breaking down the prompt engineering process:
I want to build a journalling app. This is primarily for me to tinker with projects and learn how to use AI. This is not meant to be public facing project.
This is the intention part of the prompt, where I explicitly talk about what the app looks like. The more detail I have about it, the better.
I want to build a journalling app. It needs to be a clean, minimal interface so I can just focus on freeform journalling. When I'm done, there should be a button that says "Done". After that I want to use GPT to process my journal entry, provide some reflections, and provide 2 questions that will dig deeper based on my reflection.
This is the context part of the prompt. I give it as much information as possible on what I want the project to look like.
The end goal here is to develop a PRD / build plan that I can feed into Cursor. I don't need code to be involved, just architectural details. Let's start by you asking me questions one by one to help me think through the different architectural elements of this project. Let's do it bucket by bucket. For each bucket, provide me with options and include your recommendation on how we should proceed.
This is the output + process part of the prompt. I’m telling it I want the output to be a “PRD / build plan” A PRD is a product requirements document, that is often given to engineers that includes specific instructions on what to build.
Prompting principle: Treat AI as a brainstorming buddy
Notice here, I asked it to ask me questions me questions one by one. In this context, this is key so you can give the AI more information so it builds more accurately. You can also apply this to things beyond coding projects
Trying to make a decision about anything? Ask it to ask you questions one by one
Unsure about how you want the project to look like? Ask it to ask you questions one by one
Once we have an understanding of the architecture, break apart this project into chunks. Each chunk needs to be testable and executable. Only move onto the next chunk once one chunk is complete. When you have clarity after asking my questions, you can begin building the PRD.
This is the process part of the prompt.
This is a really important part of the software building process. Most vibe coded apps break because people try to build it all at once. It’s really important to break down your big app into small, individual, testable chunks.
Once you’ve built a chunk, you can test it works, then move onto the next.
This way you’re not building a house of cards, but actually building a solid house with a solid foundation of bricks.
Final point: Build the cursor kickoff prompt
After you’ve used ChatGPT or Claude to go through the entire process above (and have answered the questions), it should output a file. Name it prd.md and save it in a new project folder. This is going to be your dedicated project folder for this app.
You’re now going to open up a Cursor. (Google how to download this) After this, load up your project folder onto cursor. You should now see the folder, plus the prd.md file.
Now what?
We need to kickstart the building process. The way to think about this part is, the prd.md includes the guide on how to build. We now have to build a prompt for cursor to reference this file (prd.md) and kickstart the building process.
You can technically just roll it all into the prd.md doc and then ask cursor to “execute”. However, I like to split it up to provide additional instruction to the agent on how to understand the file and execute it. I generated this by going back to claude/GPT (where I did the initial brainstorming and simply asking it to help me provide a “cursor kickoff promptp”) Here is that prompt that it generated:
# Cursor Kickoff Prompt

You are an experienced full-stack developer.

Implement the system described in `prd.md` exactly as written. This is a personal, minimal project. Keep everything simple, explicit, and teachable.

## Core rules (do not violate)

1. **Follow `prd.md` exactly**
   * Do not add features
   * Do not redesign UX
   * Do not extend scope

2. **Minimalism over cleverness**
   * Fewer files
   * Clear naming
   * No abstractions unless required

3. **Single deployable app (CRITICAL)**
   * Build as one Next.js app suitable for Vercel
   * Do not split into separate "frontend" and "backend" repos/services
   * All server logic must live inside the Next.js app using:
      * Route Handlers (e.g. `/app/api/.../route.ts`) or API routes
   * No separate Express server, no separate backend hosting

## System constraints

### Platform
* Web app only
* Architecture must be iOS-ready
* No mobile-specific code

### Storage
* Supabase Postgres
* Supabase Auth enabled
* RLS enforced
* Single user (but real auth patterns)

### Data model
* Journal entries are append-only timelines
* Entries consist of ordered blocks
* Block types: `human` or `ai`
* Blocks are immutable once created

## AI invocation rules (CRITICAL)

* GPT is called only when the user presses "Done"
* The OpenAI call must happen server-side inside Next.js (Vercel-hosted route handler)
* Backend must use `gpt-4-turbo` as the model name (make this a constant or env-configurable)
* GPT input = all human blocks so far
* AI blocks are never included in GPT input

### GPT output contract

GPT must return strict JSON only:

```json
{
  "reflections": ["..."],
  "questions": ["...", "..."]
}
```

Rules:
* `questions` must contain exactly 2 strings
* No markdown
* No extra prose
* No partial responses

## Basic error handling (keep this minimal)

### Supabase failures
* If saving the human block fails:
   * Show a minimal error message
   * Do not call GPT
   * Never lose the draft text in the UI

### GPT failures
* If GPT request fails:
   * Do not create an AI block
   * Preserve the human block that was already saved
   * UI shows: "Reflection failed. Try again."

### Invalid GPT output
* If JSON is invalid or not the required shape:
   * Treat as failure
   * Do not attempt auto-fixing
   * Allow retry by pressing Done again

### UI behavior
* "Done" disabled while GPT is running
* Re-enable on failure
* Error messages are small, non-blocking, and clear

No queues, no background jobs, no complex retries.

## Deployment expectations (Vercel)

* Use environment variables only:
   * `OPENAI_API_KEY`
   * Supabase URL + anon key (and anything else required)
* Ensure the app runs locally and deploys to Vercel without extra services

## Execution expectations

* Build in small, testable steps
* Each step must work end-to-end before moving on
* Prefer clarity over polish
* If unsure, choose the simplest correct implementation

## What success looks like

* User can journal freely
* Pressing Done locks the text as a human block
* Server route calls GPT and returns reflections + 2 questions
* AI block is appended and renders cleanly
* User can click a question and continue writing as a new human block
* Timeline persists after reload
* Errors never destroy or corrupt user content

---

**Start by reading `prd.md` in full. Then implement Chunk 1 only.**
Important pointers here:
- Notice the “Then implement chunk 1 only”. This is important. Otherwise, your AI will build all chunks at once without the right testing of each one. This will force it to go only chunk by chunk
- Follow the prompting principle below
Note: If you’re on the free version of Cursor, it’s worth removing the “Implement chunk 1 only” instruction and have it all build it at once. This app in particular is a simple one so its less likely to get it wrong, and saves you more tokens.
If you can, I recommend paying $20/month for this service. Allows you to build so much more
Prompting Principle: Give AI a role
”You are a full stack developer”
Giving roles to AI is a powerful wait to create more effective outcomes. By doing so, you are creating guard rails within wihich AI can create. The clearer your guardrailes, the stronger the AI’s ability for what you want.
Considering using this in your projects / practices.
Wanting therapy? Say “You are a certified licensed therapist” and then add more to the prompt.
Want help in a particular domain? Ask it to be an expert in that domain and respond accordingly.
Prompt Principle (Advanced): Commit to Git at every chunk
We’ll dive into this a bit more in the advanced section. For now, after every chunk that’s executed within cursor, type in agent box “please commit this to github” and it will proceed to give you instructions on how to do so. Again, a deeper explanation will be available in the 102 version of the guide below
If you have gotten to this point, this is 80% of it.
Getting the instructions right is THE most important part of the process. Everything from here is just tactical details.
Phase 2: Building in Cursor
After you move the PRD.md file into the folder, launch it within cursor, and then copy paste the “agent kickoff prompt” in the agent box, the agents in cursor will start to now build your app.
Lots of options on how to actually build. Codex, Claude Code Cursor that we’ll go into in the advanced version.
However for this simpler version, here are some principles to remember in this phase:
- Once Cursor has finished the build, there will be “Next steps” that you’ll have to do. I highly recommend putting in the following prompt.
Assume I'm a begineer and have no context around the next steps you've provided.

Please explain it to me simply as if i'm a beginner.
Prompting Principles: Ask AI how to use AI
When in doubt, if you don’t know where to go, or if AI instructions seem confusing, simply ask the AI on what the instructions mean, and it will help guide you. Use terms like “explain it to me simply”, “explain like i’m 5” to make instructions simpler.
Once you’ve followed through all the steps — you should have a fully functioning app!
Experiment between Agent Mode and Chat Mode on Cursor
When on chat mode, it won’t take any agent action, it will just act as a chat interface. I use this when I want to plan stuff, or just ask questions about my code. I use the Agent function when i’m ready for it to execute code.
Phase 3: Understanding the different components of your app
This is good mental model to understand how everything fits together.
For basic apps, you need the following fundamental things.
- A server to host the app — so it’s always running. This can be locally on your laptop or on a hosting service
- A database service — to store all your data
- Github — to store your code. Think of this as the google drive of your code
My go to setup for any app I’m looking to build:
- Hosting my app — Vercel. It’s super quick and easy to setup. It’s also free
- A database service — Supabase. Also quick, free and easy to setup. It’s is a PostgreSQL system
Prompting Principle: Declare your stack right off the bat
I often just tell AI at the very beginning, when i’m designing my app, that I want to use this tech stack. Makes everything much simpler
Phase 4: Make your app pretty
Here are my two go to ways for this
Use existing UI frameworks.
Google the following UI Frameworks and find what kind of vibe you like the most:
- ShadCN
- HeadlessUI
- Daisy UI
- Primefaces
- Preline
Once you find the like, simply tell the AI when you’re prompting what UI framework you’d like, and maybe toss in the link to the UI website, so it explicitly knows what you’re talking about. And AI will handle the rest
Use Lovable
Out of Replit, V0, Cursor and Lovable, I’ve found Lovable to have the best inherent aesthetic. So my usual workflow is I first design the app I want on lovable. When I do it on lovable, I make sure to tell it to NOT build a functional app, just a clickable design prototype. Then I tweak it accordingly.
Once I do that, I simply screenshot the designs and upload it to cursor so it knows how to adjust the design of the app
That’s it! This brings is to the end of the 101 section. If you’d like to dig deeper, proceed to 102.
Phase 5: Level up in AI by levelling up your Information Diet
Here’s how I stay on top of all things AI
- Be chronically on X. Follow these folks and your feed will be super AI forward quite instantly:
- Andrej Karpathy (@karpathy) - Former Tesla AI director
- Sam Altman (@sama) - CEO of OpenAI
- Greg Brockman (@gdb) - Co-founder of OpenAI
- Boris Cherny (@bcherny) - Created Claude Code
- Thariq (@trq212) - Works at Anthropic
- Sign up to AlphaSignal.ai. It’s a daily AI newsletter. They include top AI research papers
- Keep building stuff. You get much better at coding stuff the more you use it
App Building 102 (Advanced Vibe Coding Principles)
Before we explore some of the more advanced techniques for vibe coding, here are some fundamental things you need to know.
Understanding the Terminal (CLI)
What is the Terminal?
The terminal (also called Command Line Interface or CLI) is a text-based way to talk to your computer. Instead of clicking buttons, you type commands.
Why it matters:
- This is how you execute files like python files
- AI coding assistants can execute commands directly
- Many development tools work better through the terminal
Try this out: (if Mac)
- Search for terminal
- Goal: Try to find the folder where you built your earlier project using the following commands. Experiment by entering them one at a time and hit enter:
pwd- Shows where you are
ls- Shows files in current folder
cd folder-name- Move into a folder (usecd ..to go back)
Try this out: (if Windows)
- Search for Command Prompt (or PowerShell)
- Type the following commands one at a time and hit enter
cd– Shows where you are (current directory)
dir– Shows files and folders in the current directory
cd folder-name– Move into a folder (usecd ..to go back)
Using Codex or Claude Code
Right now, every single advanced developer is using Claude Code to build projects.
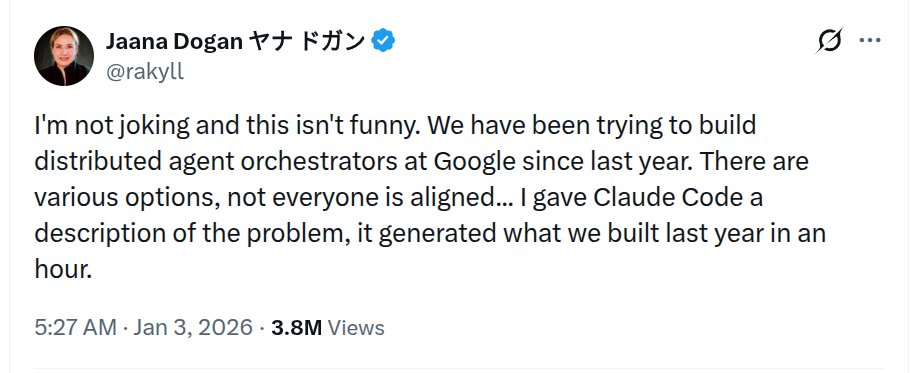
This is Jaana, one of the best engineers in the world. She is also a Principal Engineer at Google (a literal competitor to Claude) saying how amazing Claude is.
It’s super worthwhile learning how to use it.
Now I’m not going to go into how to download this. You can figure this out pretty easily. But I’m going to write out some best practices on how to use it.
Use Codex/Claude instead of ChatGPT for planning projects
How do you know whether to user Cursor or CLI tools like Codex/Claude?
If you’re building personal projects, it simply comes down to preference. Folks that choose Cursor do so because it still gives the IDE feel, which basically means they’ll be able to look at the code that is also being generated in real time. It’s also a flat, $20/month fee.
Others, exclusively prefer Claude Code / Codex because:
- Super easy to use right from the command line
- It’s what most developers use
- Can handle more complex reasoning tasks
- Is API based pricing, i.e you don’t pay per month, you pay per token
- For Codex: If you are a ChatGPT Plus user, you already have some Codex credits you can use to get started
My take, use the project example above and try both! The project is simple enough that you can complete in minutes with either tool. Once you’ve tried both, you can then decide for yourself what your primary mode would be moving forward
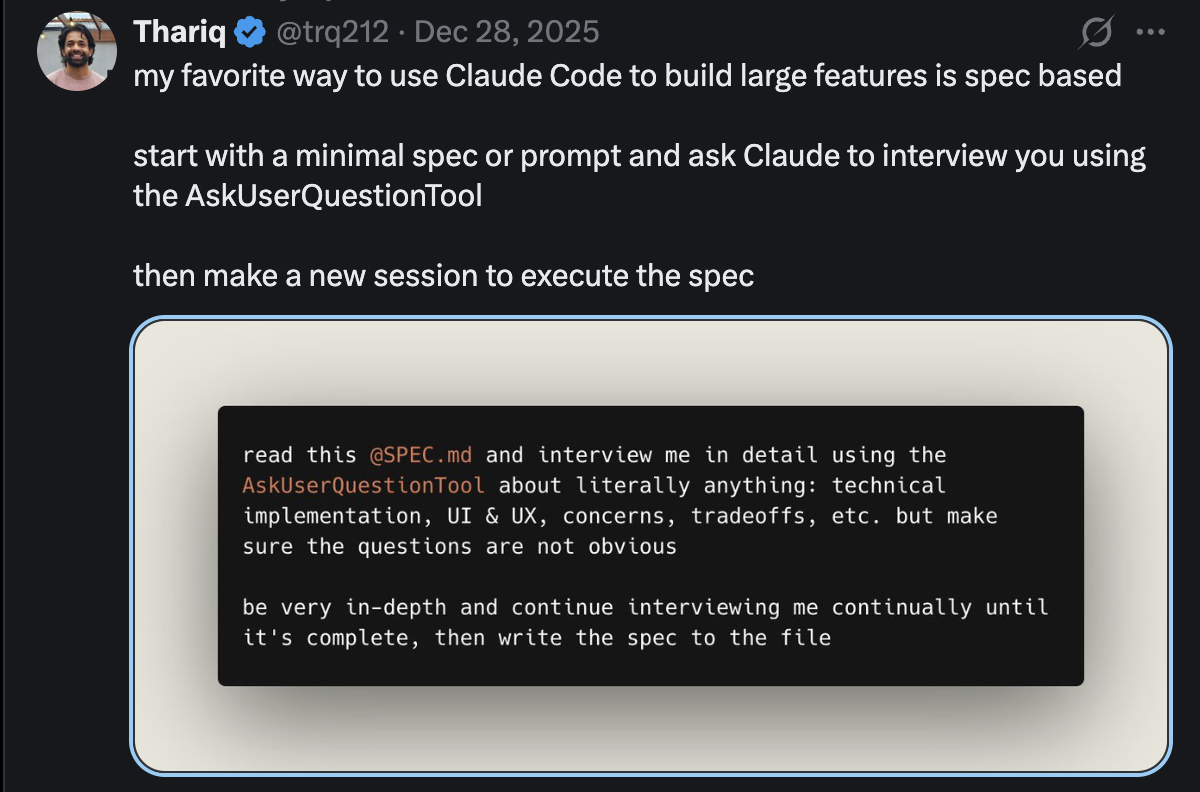
Building your PRD.md or spec sheet using Claude Code
The exact same process we outlined earlier could also be used in Claude Code. I used the following version of the prompt (modified it) to build my apps.
My modification:
- I write out my entire idea as much detail as possible and save it in my project folder called idea.txt (or .md if you’re a markdown fan)
- I then write an adapted version of the prompt below into cursor itself
I want you to reference the idea.md file. Use the AskUserQuestionTool to ask me
questions one by one on anything related to architecture, UX etc. Once done,
output it as a build plan and call it spec.md. Make sure that in this build plan,
the plan is split into chunk that are individually testible. The idea is to make
sure that the probability of bugs later on are as minimal as possible by testing
each chunk one at a time.
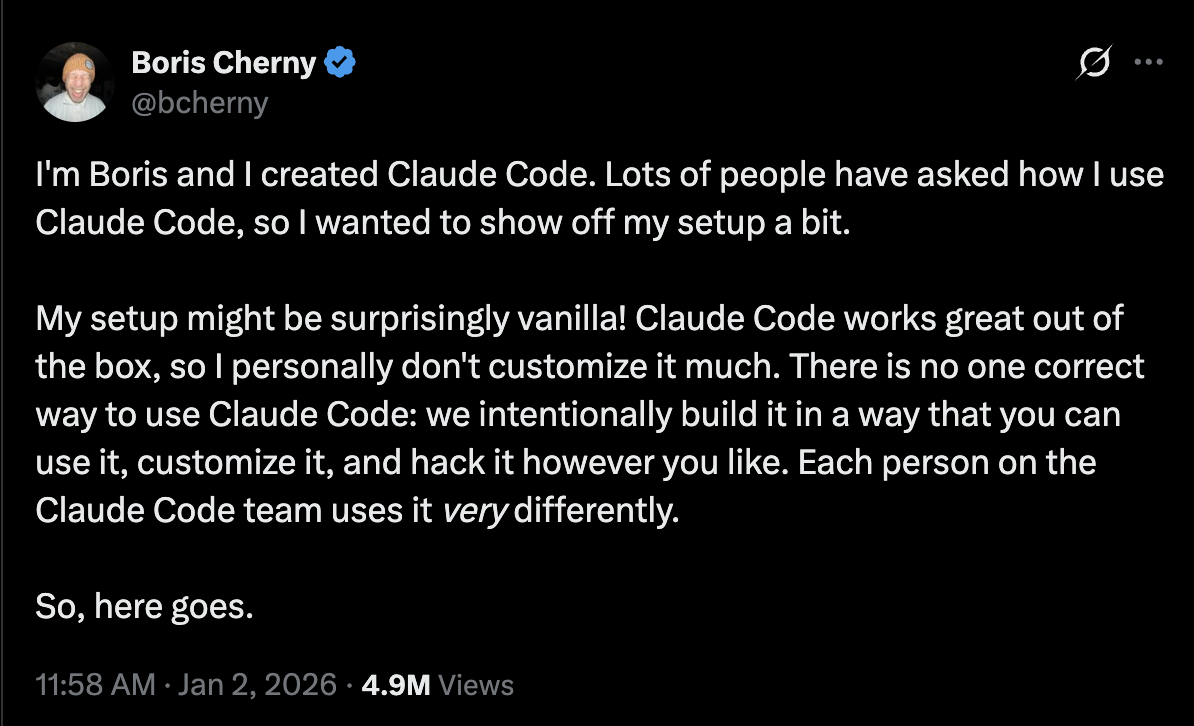
Follow Boris’ (Founder of Claude Code) on CC best practices
Github Best Practices
The best way to think about GitHub is like a Google Drive for your code. If Github didn’t exist, all you code would be on your laptop. This is fine for a simple project, however, when you start to build serious projects, you want to start leveraging Github so it’s cleaner and easier to build out your codebase and connect other services to it.
At an ultra basic level, I use it for the following reasons:
- Safety net: If something breaks, revert to a working version
- Collaboration: Multiple people can work on the same project
- Deployment: Services like Vercel can automatically deploy from Git
Best Practice #1: Create a Git Repo
This is basically creating the Google Drive for your code. This is super easy to do. Simply go to github and follow instructions. If stuck, ask GPT for help.
Best Practice #2: Commit after every chunk
Think of this practice like playing a video game. You make sure to save at checkpoints so if you die later, you can come back to the checkpoint.
Same idea here, if at any point you code goes haywire, you can always revert back to a checkpoint. The simplest way to do this is to either ask Claude/Cursor to make a commit. You literally just say it verbatim “git commit”
Best Practice #3: Push when ready
When you’re ready to push your updates live, ask the agent to “git push”
These are the basics of what you need to know when building basic projects just for yourself. There are other concepts like branching that are helpful. I recommend watching this video to brush up on your git basics.
Context Management: Get more out of limited Context
The Problem: AI assistants have limited “memory” in each conversation. Long conversations can exceed context limits.
The Solution: Maintain an architecture.md file that documents:
What you’re building
- Key decisions made
- Current state of the project
- What’s been completed
How to use it:
- Create
architecture.mdat the start
- After each chunk, tell the AI: “Update architecture.md with what we just built”
- At the start of new sessions, reference the file: “Read architecture.md to understand the current state”
- This helps the AI maintain context across long development cycles
Structuring your frontend and backend
For small projects (like this journaling app):
- Keep frontend and backend together in one codebase
- Use Next.js API routes for backend logic
- Simpler to manage and deploy
- Perfect for single-person or small team projects
For larger projects:
- Separate frontend and backend repositories
- Better for teams with specialized roles
- Easier to scale individual services
- More complex deployment and management
Rule of thumb: Start simple. You can always split later if needed. Do the larger project method if you’re serious about shipping your product to customers
❗SUPER important note on security
As soon as your app talks to anything external, a database, an AI model, a payment provider — you’re dealing with credentials that should never live in your code. .env.local is where those values belong. It’s loaded automatically during development, stays out of Git by default, and gives you a clean separation between code and configuration.
This is where things like:
- API keys
- Database connection strings
- Any sensitive or environment-specific configuration
should always go. Think of .env.local as the boundary between “things I ship” and “things I protect.”
Critical security practices
These aren’t “best practices” in the abstract — they’re how most accidental breaches actually get avoided.
- ✅ Never commit
.env.localto GitIt should already be in
.gitignore. If it isn’t, fix that immediately. Once a secret is in Git history, assume it’s compromised.
- ✅ Never share API keys in screenshots, demos, or chat
This includes Slack, Notion, screenshots for decks, and screen recordings. Keys leak far more often through humans than through hacks.
- ✅ Set usage limits on OpenAI API keys
Do this directly in the OpenAI dashboard. Rate limits and spend caps turn “oops” moments into minor inconveniences instead of expensive incidents.
- ✅ Use different keys for development vs. production
This limits blast radius. If something leaks locally, your production system shouldn’t be affected.
Common environment variables
Here’s a typical setup you’ll see in a Next.js-style app:
NEXT_PUBLIC_SUPABASE_URL=your_supabase_url
NEXT_PUBLIC_SUPABASE_ANON_KEY=your_key
OPENAI_API_KEY=your_openai_key
The key detail to understand here is scope.
- Variables prefixed with
NEXT_PUBLIC_are exposed to the browser.Use these only when the client must know the value.
- Variables without that prefix are server-side only.
Secrets like
OPENAI_API_KEYshould always stay here.
If you remember nothing else: anything the browser can see should be treated as public.
Protecting against vulnerabilities (the practical way)
Even if you handle secrets correctly, vulnerabilities can still creep in through logic errors, dependencies, or unsafe patterns. One of the simplest, highest-leverage moves you can make is to ask Claude Code to analyze your codebase for security issues.
A prompt as simple as:
“Review this repository for common web application vulnerabilities, insecure patterns, and dependency risks. Suggest fixes.”
will often catch things humans miss — especially in fast-moving AI projects.
This doesn’t replace real security audits, but it’s an extremely strong baseline for solo builders and small teams.
For those who want to go deeper
If you’re genuinely interested in cybersecurity — not just avoiding mistakes, but understanding how vulnerabilities are found — this write-up is excellent:
It walks through a real-world API vulnerability end to end, and it’s exactly the kind of thinking that sharpens your instincts as a builder.
fin.